Wednesday, February 23, 2011

I ♥ My Sailor

I won a giveaway on Scandalously Polished that was 4 mini bottles from the China Glaze Anchor's Away collection. The ones she gave me were:
(She also gave me Ahoy! (pink opaque glitter) but I haven't used it yet.)
Hey Sailor is a classic red creme. It's very bright and a primary true red. I liked it! If you don't already have a perfect red creme, this is a good one to go with.
First Mate is the perfect Navy blue. Not only is it true to the color it's supposed to be, it's a very pretty blue! It isn't too dark like some can be. It's another classic creme, like Hey Sailor, but this one is more unique. CG couldn't have gotten the shade more spot on.
Ice Cap is a really fun semi-translucent glitter. The base is clear, but kind of milky, so it does show up. That is what I used for the stripes in my mani. I think they show up really well even though the color is translucent, which means it's less translucent than it seems at first! It has a pretty serious amount of microglitter that flashes white, silver, green, and gold. The picture of my anchor nail to the left really shows how the glitter can flash quite brilliantly.

I freehanded the stripes and designs, then used my white Sally Hansen Nail Art Pen to make the red pop a bit more. This was kind of an afterthought, but I thought it turned out well.


My boyfriend Jeremy is a Navy Sailor and he deployed about a month ago. This is my first military boyfriend, military experience, and first time going through a deployment. Valentine's Day was the first big holiday to pass after my hunny left home. It was very hard, but also exciting to try and figure out a new way to make this work. I sent him a care package decorated and filled with love (he sent me one too), and did my Valentine's Day nails in honor of him.
I my Sailor

Sunday, February 20, 2011

My First Ruffian: Zoya Deidra and Stacy

This was my very first ruffian manicure. From what I understand, since you have to put one color over another, the second color has to be darker than the first. So I chose Zoya Deidra as a base color.


Isn't she something? I was worried that Zoya Deidra was going to be pretty sheer, but she was opaque in two coats! The finish is a mix between a frost and a shimmer. It is just so gorgeous! The polish applied perfectly.

Now for the ruffian part...I thought, this is easy, no big deal. Well here is my logical attempt at the ruffian.
It didn't look right at all! I thought to myself, there must be an easier way! Lo and behold I typed in "how to ruffian" and the first link that popped up was a life saver. This amazing tutorial by Laquerized couldn't have been better. She even made cool graphic pictures to explain the steps. Now it sounds like what you'd do anyway, but the little details are what matters. I read it and I was like, well I thought that's what I was doing. I studied it, then tried again, and got much better results. To add some tips of my own, it's best to use a color for the top that is opaque in one coat. I also think the color I chose for the bottom was a bit close to my skin tone (as Laquerized advises against), but I can't quite decide. I think the frostiness helps make it pop a bit more, and it really does look more contrasting in person.

Zoya Stacy is a gorgeous berry wine color with a cream finish. I would say she's opaque in two coats, but I wanted to use her for this so I just made them a bit thicker than I normally would and it was perfect. She is a little dark, but I don't think she ever looks black. That's important to me in a dark polish. If I wanted it to look black I'd wear black. As you can see from the two right above, it really depends on the lighting how she looks at any given moment. I think it's gorgeous!

What do you think about ruffian manicures? Would you do one, have you done one? You can see more pictures of other ruffians here to get an idea.

Tuesday, February 15, 2011

My Blog Facebook Page!

Please join my new Facebook page for my blog! I post things there like new ideas, possible future posts, inspiration, deals going on in the polish/makeup world, and other things. I also have an album where my swatch pictures are compiled.

There is something I'd rather post there than here right now. I need some inspiration for a GIVEAWAY! That's right, it's about time. I just hit 40 followers, so I'm thinking at 50 I'll announce a giveaway. Hopefully that will get me even more followers too!! So please join my facebook page, as I'd love some ideas for this giveaway.

Monday, February 14, 2011

Crackle Polishes

I don't own any crackle polishes yet, but boy do I want to. Loads of brands are coming out with crackles now. Shall we begin? China Glaze, for example, has 6 colors:


Head2ToeBeauty sells these for 3.49 each, 8ty8beauty sells them for 3.18 each, Transdesign sells them for 3.20 each, and I found them on Amazon for as cheap as 3.80 each. If you want to buy it in store, Sally Beauty and Ulta should both be carrying it soon, as I don't see it on their web pages.


Crazed Expressions has an awesome collection of 20 shades. They look pretty sweet. The only bad thing is I can't find them for sale...anywhere except Ebay. I sent them an email so we'll see if I get a helpful reply.

BYS also sells a crackle polish in 14 shades. They also come in little sets with a base color, the color of crackle, and a top coat too. You can buy this online at FashionAddict for 4.95 each. This is the only place I can find it.


This weird foreign brand that looks like BK has some cool colors that the other lines don't carry, like brown and some different reds. You can still order them from TrendInCosmetics for 6.00. I've heard that you can get them for less than 3.00, but I haven't found where yet.

Bornpretty, a store you should all be familiar with, sells 7 colors for 4.52 each. Free shipping! They also sell a lot of cute nail art stuff like rhinestones and brushes.

Barry M has a black crackle polish like OPI's, not to mention loads of other cute ones, but I can't find a single place in America that sells this. It's a European brand.


I'm really interested in how people will start taking the crackle polishes to new levels and doing some great nail art with it. The first picture is an example from Crazed Expressions. I founds some more that I will link to instead of posting them here since they belong to other bloggers. The Laquerista did OPI's Black Shatter over a holo here, and over neon sponged nails here.

So the crackle fad is spreading! Though many brands now make a crackle polish, it looks like the China Glaze one will be the easiest to get ahold of. I'd love to try all the colors from Crazed Expressions though.

Will any of you be purchasing a crackle polish, or have you?

Sunday, February 13, 2011

Zoya Gemma


Isn't she pretty? Zoya Gemma is from Zoya's spring Intimate Collection. The formula is great, applies like a dream, and opaque in 2-3 coats. She is a dusty olive green creme, a very unique color. The blue duochrome shimmer makes it even more unique and fabulous. Unfortunately, as you might have heard, this is much more visible in the bottle than on the nail. I'm not even sure one could notice it on the nail if she/he wasn't looking for it.

Here is a picture of Gemma in the bottle. It's really amazing, it just doesn't transfer to the nail as well. If you look, many of the pictures I'm posting of Gemma do have a hint of the blue shimmer, and that was all I could get out of it. That being said, I still am absolutely in love. Gemma is such a unique, gorgeous, feminine green. I think green can be difficult to do and is less common for women to like as a polish color, but this green...Mwah!


This final picture is out in natural light. Even outside there isn't much of a difference, but as I said, still gorgeous! I was annoyed that my cute little blue gemstones turned into blue blobbles with my top coat lol.

Tuesday, February 8, 2011

Tutorial: Newspaper Print Manicure

This is an awesome technique where you can transfer lines of newspaper print onto your nails. Check out the first time I tried it here. This is very different from another type of newspaper manicure where you actually put little pieces of paper on your nails and stick them there like a decoupage. I much prefer this method. Doesn't it look pimp? :P
It's actually really easy! All you need is some newspaper, a pair of scissors, a small container that is deep and narrow, and some rubbing alcohol or vodka.
1. Paint your nails with your base color. Choose a very light color like white, light gray, lavender, silver, pink, etc. The color I chose for this tutorial is my latest favorite, Zoya Piper! Let your color dry completely. You can use a top coat to make it dry faster, but you probably shouldn't use drying drops as you'll need another top coat after the print.

2. Cut a separate piece of newspaper for each nail that you'd like to do. The piece should be about half an inch longer than your nail, and half an inch wider than your nail on each side, for ease of handling and to assure you completely cover your nail.
(Excuse the wet nail here, I skipped to the next step then went back to take this picture.)

3. One at a time, dip your nail into the alcohol all the way and leave it for a couple seconds to make sure it's all the way wet.

4. Take it out, then immediately press the piece of paper onto your nail so that if fully covers it. It won't cover it all at once because we aren't magical, but that's okay. Just make sure to always be holding the paper in the same place on your nail at one point, while rubbing gently with your fingers on the other parts of the nail. Make sure to get the parts closest to the edges and the cuticles as well. You can peek under the newspaper after you think you've got your nail covered with the newspaper print to see if you're really done. (This picture was hard to take because normally you'd have both hands).

5. Do the above with all 10 nails before putting a topcoat on to seal the design in. I made the mistake of topcoating each one as I did it because I watched a tutorial like that and I messed a lot of them up. Just be careful as you're doing the other nails that you don't dip one you've already done in the alcohol, or rub it, as the print will come off. This is what it looks like before the top coat. The top coat makes it so much better. Not only does it seal in the design, it makes it appear more clear so the final result is better.
This is actually a really easy manicure to do. It was only difficult because I was doing this tutorial on a false nail instead of my hands. It was actually way easier on my own nails because I could hold the paper with the hand I was doing with my adjacent fingers, then rub the paper with my free hand.

Please let me know if you try this!

Friday, February 4, 2011

Zoya Kelly with Zoya Soho Punch

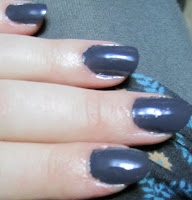
Zoya Kelly is a gorgeous dark gray creme with a hint of blurple to it. I was worried after I ordered it but before I got it that it would just be a normal, boring, dupey gray, but it's not. I really like it and it's definitely more exciting than just gray. This is totally a one coater. It was like 95% perfect so it could have used a second coat, but I knew I was going to layer something on top of it so I didn't mind.
So I played with Zoya Kelly and Soho Punch! Soho Punch is part of the Glamsicles collection where all these polishes are sheer, a different jelly base color, and contain glitter in different colors. The glitter in this collection is on the subtle side, nothing like Zoya Astra. I like to call it the sophisticated rainbow glitter. It flashes so many different colors. the particles are very tiny, and are slightly flaky. I wouldn't dub the polishes in this collection flakies, but they're glitters with a hit of flakiness. Soho Punch is the pink one in this family. I think it's really fun :D. This is a really intricate polish that looks different from every angle, so allow me to overload you with pictures.
Isn't it awesome? Soho Punch added a pink hue to my base color Kelly, and added all the cool glitter. Here are some close up shots of nails that looked particularly awesome in other pictures.

You like you like? :D